The Tickets Overview page gives you a glimpse of all the features available under the ticketing page. You can view all the tickets, manage them, assign them, mark them closed and take action for the tickets.
With XEBO.ai, the ticket system has different features depending upon your role. The admin of the account has complete control of the system and the admin can assign the ticket, change status, see all the tickets generated. However, users would only be shown the tickets that are assigned to them. They won’t have the option to see other tickets.
You have multiple features available:
.png)
Tickets Overview: This section shows you the Overview of different sections. By default, you see the Ticket Overview section. In the Overview section, you get options:
Tickets Overview: This section shows you the overview of your ticketing performance.
New Tickets: This section shows all the new tickets generated.
Open Tickets: This section shows you all the tickets whose status is defined as Open.
In Progress Ticket: This section shows the tickets that are in progress of being solved.
Closed Ticket: This section shows the tickets that are marked as closed after being solved.
Overdue Ticket: This section shows the tickets that are past their deadline of being marked as closed.
Unassigned Ticket: This section shows the tickets that are not assigned to any user yet. Every ticket is assigned to a user or a group. But in case there is no assignee, the tickets are placed under this category.
Closure Rate: This section shows you the percentage of tickets that are marked as closed after being solved within a specific time period. You can apply time filters and analyze the trends of percentage of tickets being closed.
Ticket Trends: This section shows you the trends of the tickets over a period of time. You can see the trend and decipher if the ticket numbers have declined or increased.
Total Tickets by Priority: This section shows you a chart of all your tickets based on priority. There are three options available – high, medium, low.
Average Resolution Time: This section shows you the average time taken by you to resolve the tickets.
Various filters can be applied to the Tickets Overview page. You get options:
Filter by Business Unit: This option lets you filter the tickets on the basis of the business unit to which the ticket is assigned.
Filter by Priority: This option lets you filter the tickets on the basis of its priority. The ticket priority options are - high, medium and low.
Filter by Agents: This option lets you filter the tickets on the basis of the agent to which the ticket is assigned.
Filter by Surveys: This option lets you filter the tickets on the basis of the survey for which the ticket is created.
Filter by Date: This option lets you control the time period for the ticketing page. You can toggle between different time periods or set your custom time period.
Share: This option lets you share your ticketing page with others in read-only mode. This is helpful when you wish to share your ticket module without giving access to it.
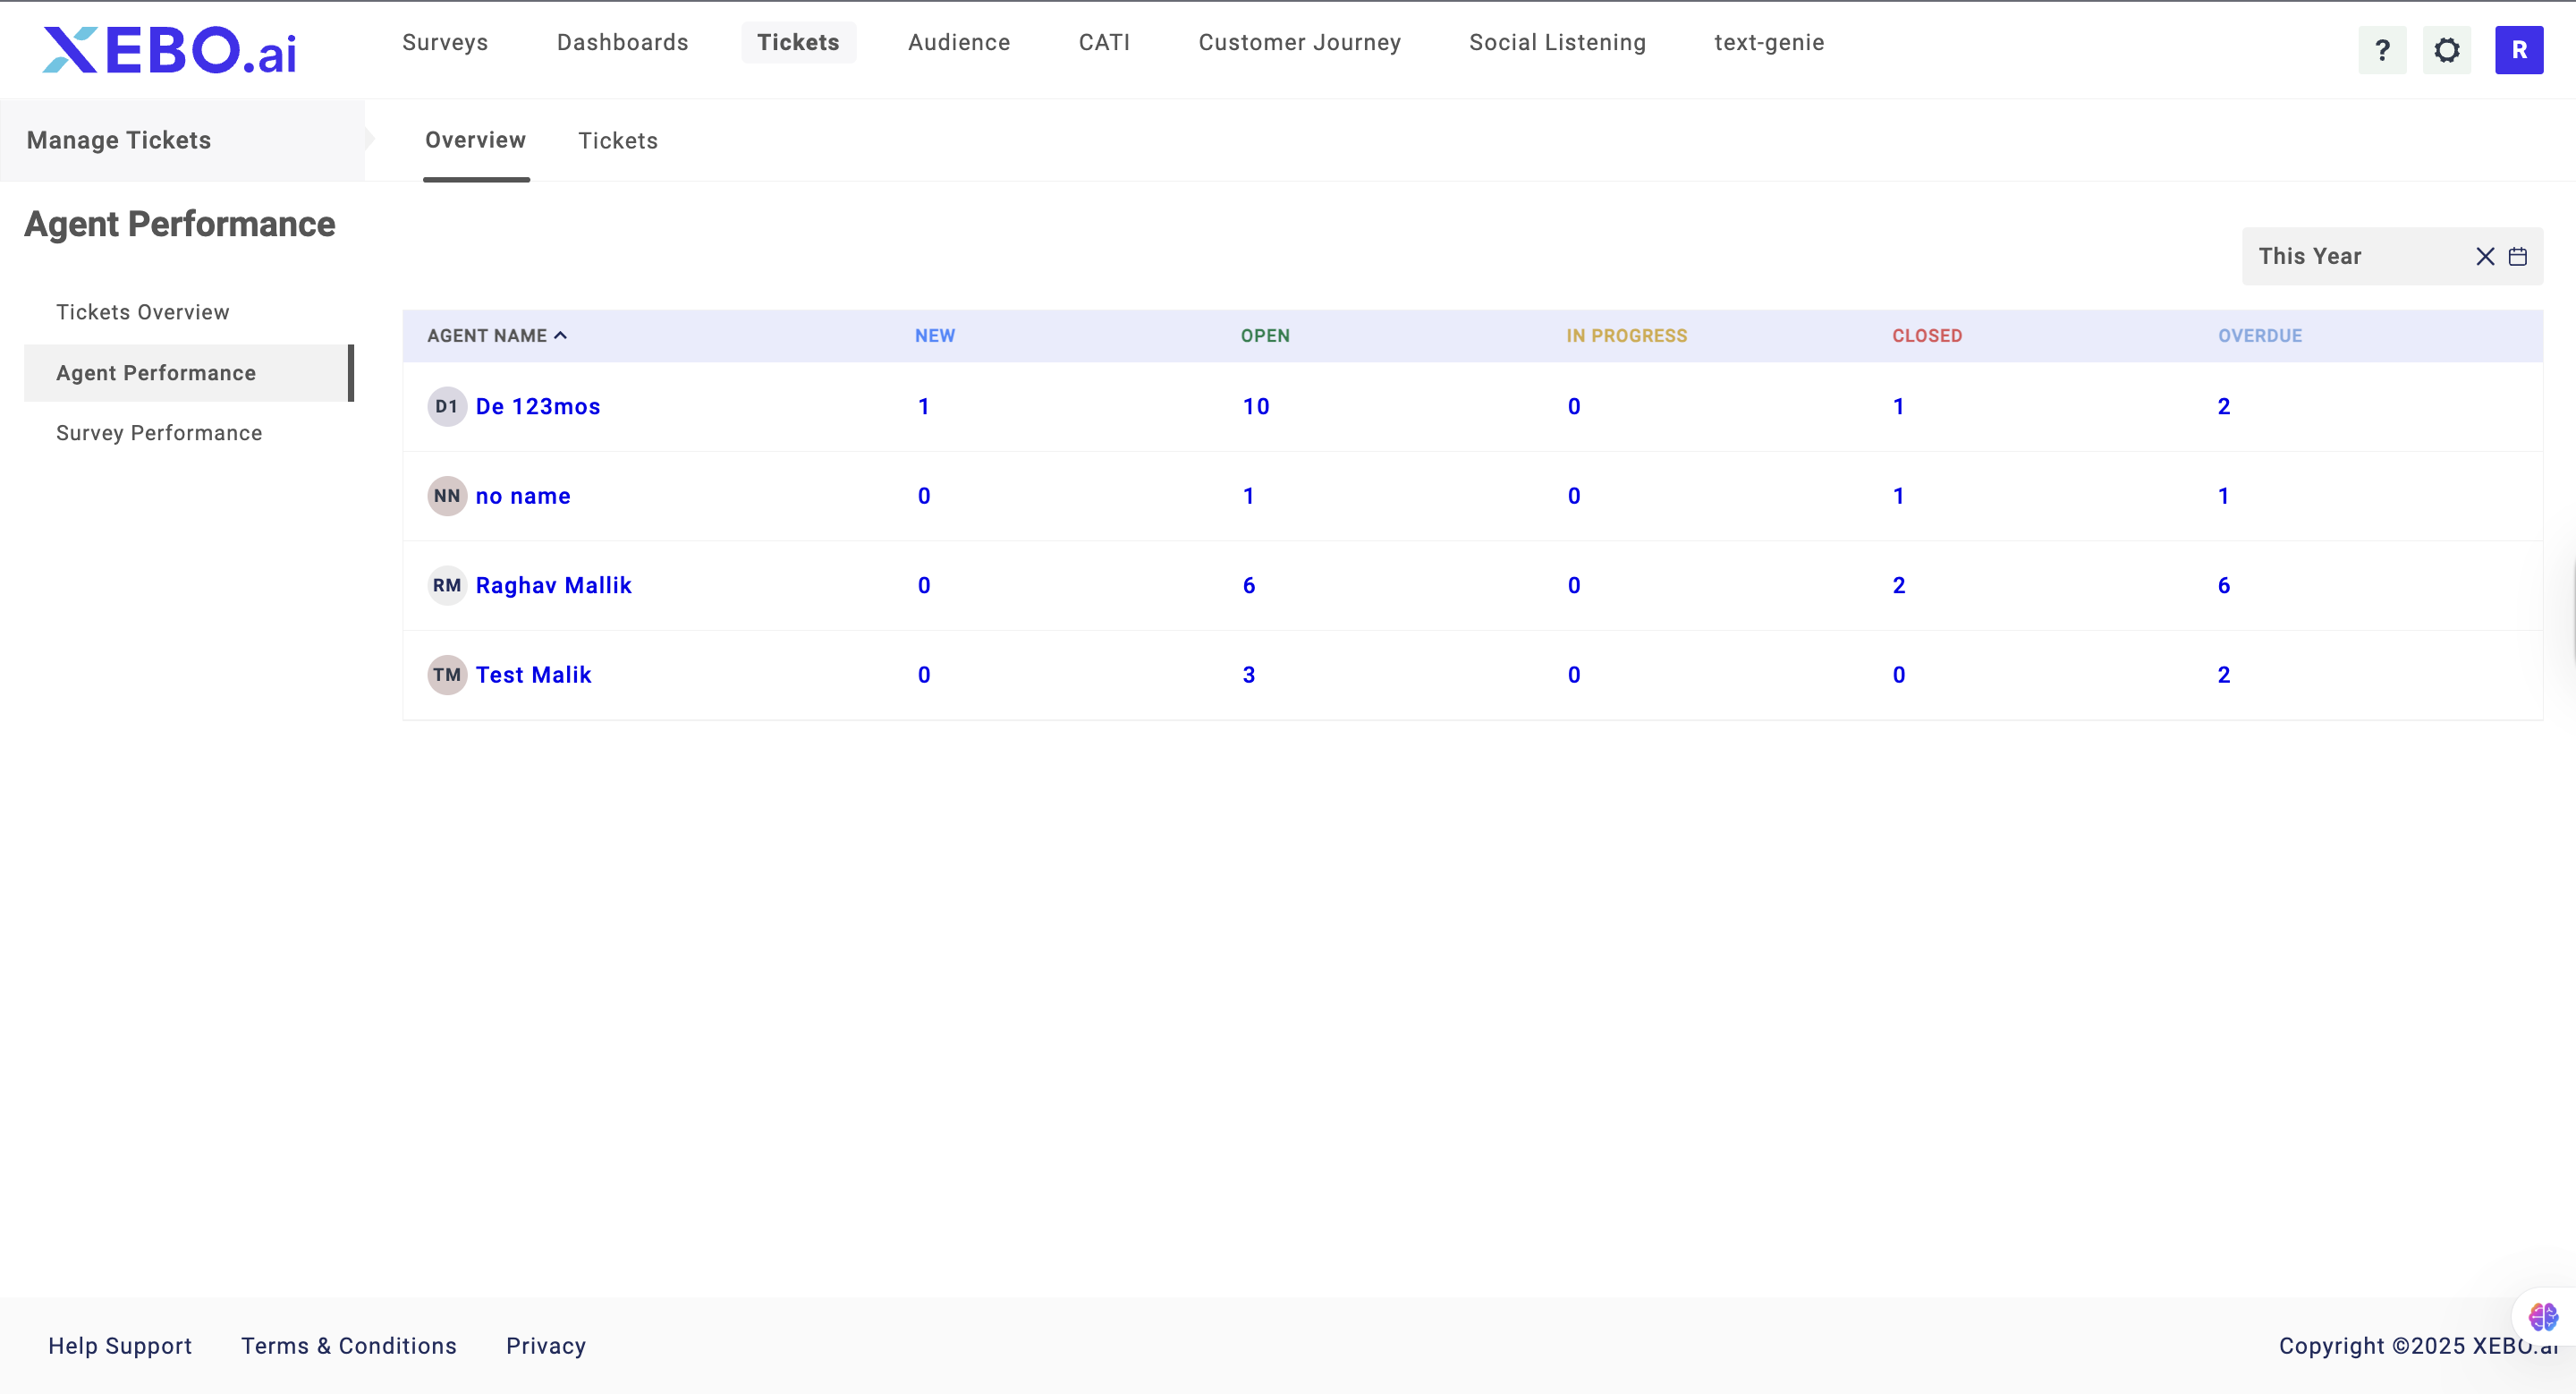
Agent Performance: This section shows you the overview of your agents and their performance and how many tickets are being generated via agents.
Survey Performance: This section shows you the overview of the Survey and how many tickets are being generated by each survey

Tickets: This section shows you all the tickets in their respective sections. The options you get are:
.png)
New Ticket: This shows you all the new tickets
Open Tickets: This shows you all the tickets that are marked as open
In Progress Tickets: This shows you all the tickets that are marked as “In-Progress”.
Closed Tickets: This option shows you all the tickets that are marked as closed
Deleted Tickets: This section shows you all the tickets that were deleted by you or your team.
Overdue Tickets: This section shows you all the tickets that are marked as Overdue.
Unassigned Ticket: This section shows you all the tickets that are unassigned, which means that no user is assigned to the ticket.
As Watcher Tickets: In the case of the admin account, this would show all the tickets that have a watcher assigned to them. However, for a user, this section would show the tickets that are assigned to the user as a watcher.
You can also search for a ticket and apply the following filters:
Priority: This option lets you select the type of ticket you will see on the basis of its priority. The options available are – all, high, medium, low.
Agents: This option lets you select the tickets visible to you on the basis of Agents.
Surveys: This option lets you select the tickets visible to you on the basis of Surveys that generated tickets.
Filter by Date: This option lets you apply a time filter on the tickets. Only the tickets between the assigned time period would be shown to you.
Bulk Action: The bulk action option lets you select multiple tickets at once to perform bulk action.
Export: This option lets you export the ticket data. You can select the tickets you want to export.
Settings: This option lets you manage the settings of the ticket page. You can add custom statuses and ticket fields.